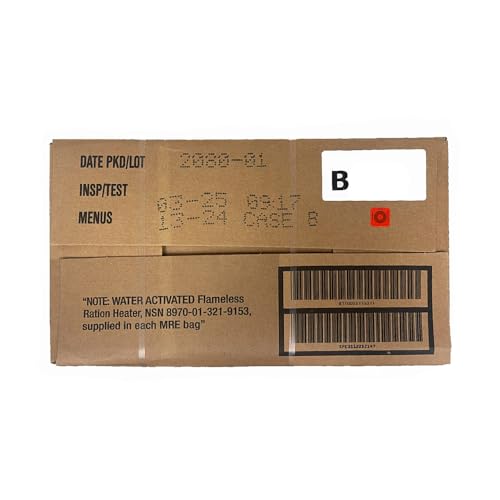


If you find yourself in a situation where you need to rely on MREs (Meals Ready to Eat) for sustenance, it’s important to know how to properly cook them. MREs are self-contained, individual field rations that are commonly used by the military and outdoor enthusiasts. These meals are designed to be durable, lightweight, and require minimal preparation. In this article, we will guide you through the process of cooking an MRE so that you can enjoy a hot and satisfying meal even in the most challenging conditions.
Step 1: Open the MRE
The first step in cooking an MRE is to open the package. Most MREs come with a tear notch or a built-in serrated knife for easy opening. Carefully tear the package along the designated notch or use the knife to cut through the seal. Be cautious not to damage the contents inside, as the packaging may contain important information and accessories.
Step 2: Heat the Entrée
After opening the package, locate the main entrée. This is usually a sealed pouch that contains the main course. To heat the entrée, you have a couple of options. The most common method is to use the MRE heating element, also known as the flameless ration heater. To activate the heating element, simply add a small amount of water to the pouch, fold the top, and position it in the heater sleeve. The chemical reaction will generate heat and warm up the food over the course of approximately 10-15 minutes. Another option is to use an external heat source, such as a portable stove or a campfire. Make sure to read the instructions on the MRE packaging for specific heating directions.
Pro tip: If you are using the flameless ration heater, place the heated entrée in an insulated container, such as a jacket pocket, to keep it warm while you prepare the sides.
Preparing the MRE
Once you have chosen the MRE you would like to cook, it’s time to prepare it for consumption. Follow these steps to properly prepare your MRE:
- Tear open the package: Use the designated tear notches to open the MRE package. Be careful not to rip any of the contents inside.
- Remove the contents: Take out all the components of the MRE, including the main dish, side dishes, snacks, and any condiments.
- Check for any damages: Inspect the items for any signs of damage or spoilage. If anything looks or smells unusual, discard it immediately.
- Heat the main dish: Open the main dish package and place it in the flameless ration heater. Add water to the heater up to the indicated fill line. Fold the heater and secure it with the adhesive strip. Allow the main dish to heat for the recommended time, usually 10-15 minutes.
- Prepare the side dishes: Open the packages of side dishes and snacks. If desired, heat the side dishes in the same flameless ration heater or consume them as is.
- Enjoy your MRE: Once the main dish is heated and the side dishes are ready, it’s time to enjoy your MRE. You can eat the contents straight from the packages or use the provided utensils.
Note: It’s important to follow the instructions included with the MRE for specific heating times and temperatures. Be cautious when handling hot items and make sure to dispose of any leftover food properly.
Adding water to the MRE
One of the essential steps in preparing an MRE (Meal, Ready-to-Eat) is adding water to the pouches that contain the food.
To properly rehydrate the meals, follow these steps:
|
Step 1: |
Open the MRE bag and locate the main entree pouch. |
|
Step 2: |
Remove the main entree pouch from the MRE bag and identify the indicator lines on the side of the pouch. |
|
Step 3: |
Fill the pouch with the appropriate amount of water. The indicator lines will show you the recommended level. |
|
Step 4: |
Once the pouch is filled with water, reseal it by folding the top and securing it with the provided strip or adhesive. |
|
Step 5: |
Let the meal sit for the specified amount of time, typically around 10-15 minutes, to allow the food to rehydrate and become ready to eat. |
|
Step 6: |
After the designated time, carefully open the pouch, stir the contents, and ensure that the food is heated evenly. |
|
Step 7: |
Serve and enjoy your fully prepared MRE meal! |
Adding water to the MRE pouches is a crucial step to ensure that the food is properly rehydrated and safe to consume. Follow the instructions provided and enjoy your meal.
Heating the MRE
Heating an MRE (Meal, Ready-to-Eat) is an important step to ensure that the food is safe to eat and enjoyable. Here are a few methods you can use to heat your MRE:
| Method | Instructions |
|---|---|
| Flameless ration heater | 1. Open the MRE packaging and remove the flameless ration heater.
2. Place the heater in the MRE pouch with the food. 3. Add a small amount of water to the heater. 4. Fold the MRE pouch to help trap the heat. 5. Wait for the required time (generally around 10 minutes) for the food to heat up. 6. Carefully remove the food from the pouch and enjoy! |
| Hot water | 1. Open the MRE packaging and remove the food.
2. Place the food in a heat-safe container. 3. Boil water in a separate pot or kettle. 4. Pour the hot water into the container, ensuring that it covers the food. 5. Close the container tightly to seal in the heat. 6. Wait for the required time (generally around 10-15 minutes) for the food to heat up. 7. Carefully remove the food from the container and enjoy! |
| Microwave | 1. Open the MRE packaging and remove the food.
2. Transfer the food to a microwave-safe dish. 3. Place the dish in the microwave. 4. Heat the food on medium power for 1-2 minutes, or until it reaches the desired temperature. 5. Use a microwave-safe mitt or towel to handle the dish, as it will be hot. 6. Enjoy the heated MRE! |
It is important to follow the instructions provided with your specific MRE to ensure proper heating and avoid any potential hazards. Remember to exercise caution when handling hot food or containers.
Opening the MRE
When opening an MRE, it’s important to first locate the main packaging. This is typically a thick plastic bag with a resealable closure. The bag is designed to protect the contents from water, air, and other contaminants.
To open the MRE, start by tearing open the top of the packaging. Be careful not to damage the contents inside. Once the top is open, you can access the individual components of the MRE.
Inside the main packaging, you will usually find the main entree, side dishes, snacks, and dessert. Each item is typically individually packaged for convenience and freshness. It’s important to carefully inspect each item for any signs of damage or spoilage before consuming.
Accessing the main entree
The main entree is usually in a separate packaging, such as a foil pouch or plastic tray. To access the main entree, simply open the packaging and remove the contents. Some main entrees may require heating or preparation, so be sure to read the instructions provided.
Opening the side dishes, snacks, and dessert
The side dishes, snacks, and dessert are typically in smaller packaging that can be easily opened by tearing or cutting. Simply open each packaging and remove the contents. These items are usually ready-to-eat and do not require any additional preparation.
Once all the components of the MRE are open, you can enjoy your meal. Remember to discard any packaging and properly dispose of any waste. Enjoy your MRE!
Enjoying the MRE
After you have successfully prepared your MRE meal, it’s time to sit back, relax, and enjoy your tasty treat! Here are a few tips to enhance your MRE dining experience:
1. Find a comfortable spot
Choose a comfortable place to sit or set up a picnic area where you can fully enjoy your meal. Whether it’s outside in nature or inside your home, make sure you have enough space to spread out and savor every bite.
2. Start with an appetizer
MREs often come with a small packet of bread or crackers. Use these as an appetizer to whet your appetite before diving into the main course. Enjoy them plain or try spreading a little of the included condiments for an extra burst of flavor.
3. Mix and match flavors
Get creative and combine different components from your MRE to create unique flavor combinations. Try mixing the protein main course with the included side dishes or adding a touch of hot sauce for a spicy kick.
4. Pace yourself
MREs are designed to provide a balanced meal that will keep you fueled throughout the day. Take your time and enjoy each component at your own pace. Savor every bite and allow yourself to fully appreciate the flavors.
5. Save room for dessert
Most MREs come with a dessert option, such as a tasty cookie or pudding. Save a little space at the end of your meal to indulge in this sweet treat. It will be the perfect ending to your MRE adventure.
Remember, MREs are not just meant to provide sustenance in survival situations; they can also be enjoyable meals when you take the time to savor them. So, sit back, relax, and enjoy your MRE meal to the fullest!
Q&A
What is an MRE?
An MRE stands for Meal, Ready-to-Eat. It is a self-contained, individual field ration in lightweight packaging that is designed to provide a full meal to soldiers in the field.
How long can an MRE last?
An MRE is designed to have a shelf life of three years when stored at 80 degrees Fahrenheit (26.6 degrees Celsius). However, they can often last much longer under proper storage conditions.
What are the steps to cook an MRE?
Cooking an MRE is a simple process. First, open the main meal package and remove the contents. Then, place the main meal package in a pouch of hot water or use the flameless ration heater. Let it heat for a few minutes, and your MRE meal will be ready to eat.
Can you eat an MRE cold?
Yes, MREs can be eaten cold if necessary. The main meal is fully cooked and can be consumed straight from the package without heating. However, heating the meal can improve the taste and make it more enjoyable to eat.


