How many calories in a marshmallow tea cake
December 30, 2024


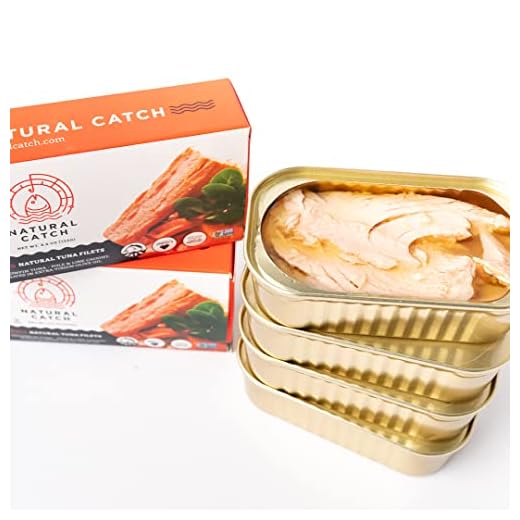

Canning tuna is a great way to preserve this nutritious fish and enjoy it throughout the year. While there are several methods to can tuna, using a pressure cooker is one of the most efficient and time-saving techniques. With a pressure cooker, you can safely can tuna at home, ensuring that it stays fresh and flavorful for months.
Before you start, it is important to note that canning tuna with a pressure cooker requires some basic knowledge of canning procedures and safety measures. Make sure you have all the necessary equipment, including mason jars, lids, and a reliable pressure cooker. It is also important to use fresh, high-quality tuna.

To begin, prepare your jars by washing them thoroughly with hot soapy water. Inspect the jars for any cracks or chips, as these can affect the sealing process. Once clean, place the jars in a large pot filled with water and bring it to a simmer. Keep the jars hot until you are ready to use them.
Canning is a method of preserving food in which the food is processed and sealed in an airtight container. This process helps to prevent the growth of microorganisms, such as bacteria, yeast, and molds, that can spoil food and cause illness or spoilage.
The canning process involves heating the food to a high temperature to kill any existing microorganisms, and then sealing the container to prevent any new microorganisms from entering and contaminating the food. This can be done using a pressure cooker, which allows for higher temperatures to be reached than traditional boiling methods.
By canning tuna, you can safely store and preserve this nutritious fish for later use. The canning process helps to extend the shelf life of tuna, making it a convenient and easy way to have a ready-to-eat protein source on hand.
When canning tuna with a pressure cooker, it is important to follow proper canning procedures and guidelines to ensure the safety and quality of the preserved fish. This includes using proper canning jars, lids, and seals, as well as following recommended processing times and temperatures.
Overall, canning is a reliable and effective method of food preservation that allows you to enjoy tuna and other foods throughout the year, even when they are out of season or not readily available. By canning your own tuna, you have control over the ingredients and can avoid additives and preservatives found in commercial canned products. So grab your pressure cooker and start canning tuna today!
Using a pressure cooker to can tuna offers several advantages over other methods:
| Faster Cooking Time | Pressure cookers can cook food up to 70% faster than traditional methods. This means that you can prepare and can your tuna in a fraction of the time it would take using other cooking methods. |
| Preserves Nutrients | Pressure cooking helps to preserve the natural vitamins and minerals in the tuna. The shorter cooking time and the steam-sealed environment of the pressure cooker retain more nutrients compared to methods that involve prolonged boiling. |
| Better Flavor | Pressure cooking enhances the natural flavors of the tuna. The sealed environment traps and concentrates the flavors, resulting in a more delicious canned tuna. |
| Safe and Efficient | Pressure cookers are designed to ensure safety during the canning process. They have built-in safety features, such as pressure release valves, that prevent the pressure from building up too high. Additionally, pressure cookers are energy-efficient, as they require less heat and cooking time compared to other methods. |
| Convenience | Using a pressure cooker for canning tuna is convenient, especially for those who have limited time or cooking experience. The pressure cooker simplifies the process and provides consistent results, making it easier for beginners to successfully can their own tuna. |
Overall, using a pressure cooker is a practical and efficient way to can tuna. It saves time, preserves nutrients, enhances flavor, ensures safety, and offers convenience to home canners. Consider investing in a pressure cooker for the best results in canning tuna.
Before you can start canning tuna with a pressure cooker, you need to make sure you have all the necessary ingredients and equipment. Here are the steps you need to follow:
Make sure you have fresh tuna, canning salt, canning jars with lids, and any additional ingredients or spices you want to add to your canned tuna.
Start by cleaning the tuna thoroughly and removing any bones or skin. Cut the tuna into chunks or slices of your desired size and set them aside.
Before filling the jars with tuna, you need to sterilize them to ensure the safety and longevity of your canned tuna. Wash the jars and lids with hot, soapy water, then place them in a pressure cooker filled with enough water to cover the jars. Close the pressure cooker and bring it to a boil. Let it boil for 10 minutes to sterilize the jars. Remove the jars carefully and let them cool.
While the jars are sterilizing, prepare the brine. You can use a simple brine made of water and canning salt or add additional spices and flavors to enhance the taste of your canned tuna. Bring the brine to a boil and let it simmer for a few minutes.
Once the jars are cool, pack them tightly with the prepared tuna pieces. Leave about an inch of headspace at the top of each jar to allow for expansion during the canning process. Pour the hot brine into each jar, covering the tuna completely.
Make sure there are no air bubbles trapped inside the jars. You can use a clean plastic utensil to gently stir the contents and release any trapped air. Wipe the jar rims clean with a damp cloth to ensure a proper seal.
Finally, place the lids on the jars and screw them on tightly, but not too tight. The jars are now ready to be processed using a pressure cooker.
When it comes to canning tuna with a pressure cooker, selecting fresh tuna is essential. Here are some tips to help you choose the best quality tuna for canning:
When examining the tuna, the eyes should be bright and clear, not cloudy or dull. This is an important indicator of its freshness. Avoid tuna with sunken or discolored eyes.
The flesh of the tuna should be firm to the touch and have a shiny appearance. Avoid tuna with soft or mushy flesh, as it could be a sign of spoilage.
Remember to purchase your fresh tuna from a reputable fishmonger or grocery store. Ask if they have received the fish that day or the day before to ensure the highest quality. By selecting the freshest tuna, you can guarantee that your canned tuna will taste its best.
Before you can begin the process of canning tuna with a pressure cooker, it is important to gather all the necessary supplies. Here is a list of items you will need:
1. Pressure Cooker: Make sure you have a pressure cooker that is large enough to hold the cans of tuna you plan to can. It should also have a functioning pressure gauge and sealing ring.
2. Canning Jars: You will need clean, sterilized canning jars with lids and rings. Choose jars that are suitable for pressure canning.
3. Tuna: Select fresh tuna that is of high quality. You can either catch your own tuna or purchase it from a trusted source.
4. Canning Salt: Use canning salt instead of regular table salt, as it does not contain any additives that may affect the preservation process.
5. Water: Make sure you have access to clean, potable water. This will be used both in the pressure cooker and for cleaning purposes.
6. Utensils: Gather all the necessary utensils, such as a canning funnel, jar lifter, and a ladle. These will help you handle and transfer the tuna and liquids safely.
7. Clean Cloth or Towels: Have clean cloth or towels on hand to wipe down the jars, lids, and rings before canning.
8. Labels: Prepare labels to mark the jars with the date of canning. This will help you keep track of the freshness of your canned tuna.
9. Timer: Use a timer or a clock to accurately measure the processing time for your canned tuna.
By gathering all these necessary supplies beforehand, you can ensure a smooth and efficient canning process.
Step 1: Start by gathering the necessary equipment. You will need a pressure cooker, canning jars with lids, tongs, a jar lifter, a clean towel, and fresh tuna.
Step 2: Clean and sanitize all your canning jars and lids. Make sure they are free from any dirt or debris.
Step 3: Cut your fresh tuna into desired-sized pieces. You can choose to dice it or leave it in larger chunks.
Step 4: Place the tuna pieces into the sanitized canning jars, leaving about half an inch of headspace at the top.
Step 5: Add any desired seasonings or herbs to the jars, such as salt, pepper, or lemon juice.
Step 6: Wipe the rims of the jars with a clean towel to ensure a proper seal.
Step 7: Place the lids on the jars and screw them on tightly.
Step 8: Fill your pressure cooker with enough water to submerge the jars, but make sure not to overfill it.
Step 9: Carefully place the jars into the pressure cooker using tongs or a jar lifter. Make sure they are not touching each other or the sides of the cooker.
Step 10: Close the pressure cooker lid and turn the heat to high.
Step 11: Allow the pressure cooker to come to the appropriate pressure and then reduce the heat to maintain that pressure.
Step 12: Process the tuna jars according to the recommended guidelines for your specific pressure cooker and altitude. This usually takes around 90 minutes at 10 pounds of pressure.
Step 13: Once the processing time is up, turn off the heat and let the pressure cooker cool down naturally.
Step 14: Once the pressure cooker has cooled, carefully remove the jars using tongs or a jar lifter and place them on a clean towel to cool completely.
Step 15: Check the seals on the jars by pressing down on the center of the lid. If it does not move or make a popping sound, the jars are properly sealed.
Step 16: Label and store your canned tuna jars in a cool, dark place for future use.
Note: Canning tuna in a pressure cooker requires caution and adherence to proper canning techniques to ensure food safety. Make sure to follow the recommendations of your pressure cooker manufacturer and consult a reliable canning resource for detailed instructions.
The best way to can tuna with a pressure cooker is to start by preparing the jars and lids. Then, cook the tuna until it’s fully cooked and tender. Next, pack the tuna into the jars, leaving some headspace. Finally, process the jars in a pressure canner at the recommended pressure and time based on your altitude.
Yes, a pressure cooker can be used to can tuna. It’s a safe and efficient method for canning tuna as it allows you to achieve the high temperatures required to kill any potential bacteria. Just make sure to follow proper canning procedures and guidelines.
The steps for canning tuna with a pressure cooker are as follows: 1. Prepare the jars and lids. 2. Cook the tuna until it’s fully cooked and tender. 3. Pack the tuna into the jars, leaving some headspace. 4. Clean the jar rims, place the lids on, and tighten the rings. 5. Process the jars in a pressure canner at the recommended pressure and time based on your altitude. 6. Allow the jars to cool, check the seals, and store them in a cool, dark place.
Using a pressure cooker when canning tuna is important because it allows you to achieve the high temperatures necessary to kill any potential bacteria, ensuring that the tuna is properly preserved. The high pressure in the cooker also helps to maintain the quality and texture of the tuna during the canning process.
The processing time for canning tuna with a pressure cooker can vary depending on your altitude. Generally, it takes about 100 minutes at 10 pounds of pressure for pint jars and 120 minutes for quart jars. It’s important to consult a reliable canning guide or recipe for specific processing times based on your altitude.
You will need fresh tuna, canning jars, water, salt, and a pressure cooker.
Yes, you can use frozen tuna. Just make sure to thaw it completely before canning.